

Fai da te: renna porta-menu - DIY: reindeer display for Christmas menu
Mancano esattamente 54 giorni a Natale!
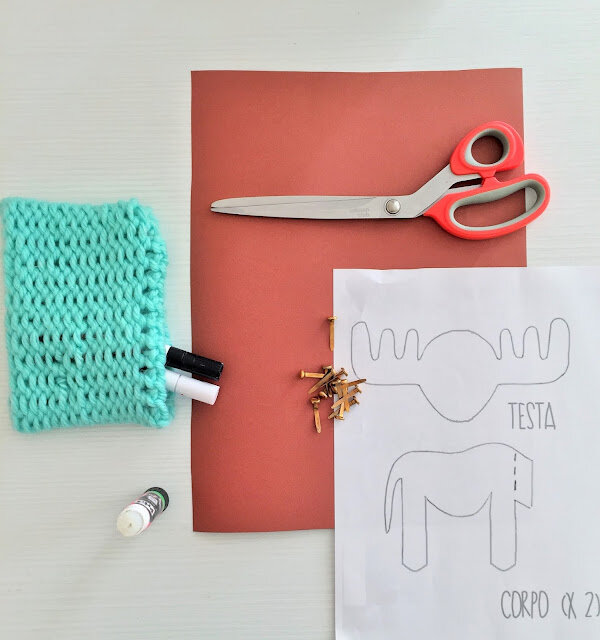
Cosa ti serve:
- Pennarello nero
- Black felt pen
- Forbici
- Scissors
Sono impaziente di apparecchiare la tavola con aghi di pino, posate "pesanti" e calici eleganti che durante tutto l'anno sono rimasti in un angolo della cucina.
Per smorzare un po' i toni ho inventato un segnaposto spiritoso e carino davvero facile da realizzare.
There are exactly 54 days left from Christmas!
I'm impatient to style the table with pine needles, "heavy" silverware and elegant chalices which, for the rest of the year were in a corner of the kitchen.
To tone down, I invented an happy and cute place card very easy-to-make.
Cosa ti serve:
What you need:
- Cartoncino colorato.
- craft paper
- Fermacampioni. Ne servono 2 . Di solito sono in vendita in scatoline da 100 pezzi.
- Split pins. You'll need 2. Usually they are sold in a box of 100 items.
- Split pins. You'll need 2. Usually they are sold in a box of 100 items.
- Pergamena, o foglio sottile. Questa sarà la base dei vostri menù. Io ho acquistato un foglio grande, tagliandolo in rettagoli 4x8 cm.
- Parchment or fine paper. This will be the base of your menus. I bought a big sheet and I cut 4x8 cm rectangles.
- Parchment or fine paper. This will be the base of your menus. I bought a big sheet and I cut 4x8 cm rectangles.
- Pennarello bianco
- White felt pen
- Pennarello nero
- Black felt pen
- Forbici
- Scissors
- Matita
- Pencil
- Colla
- Glue
- Colla
- Glue
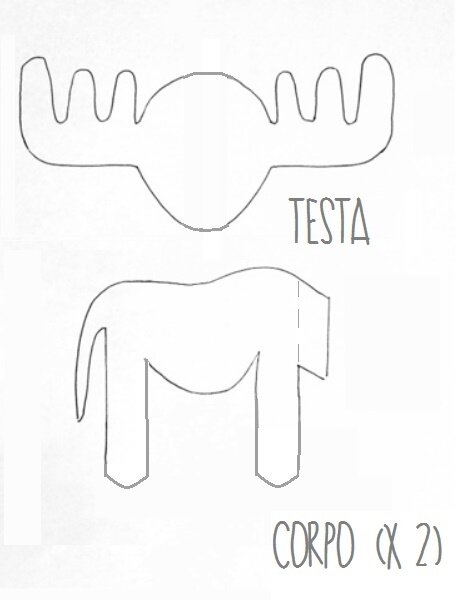
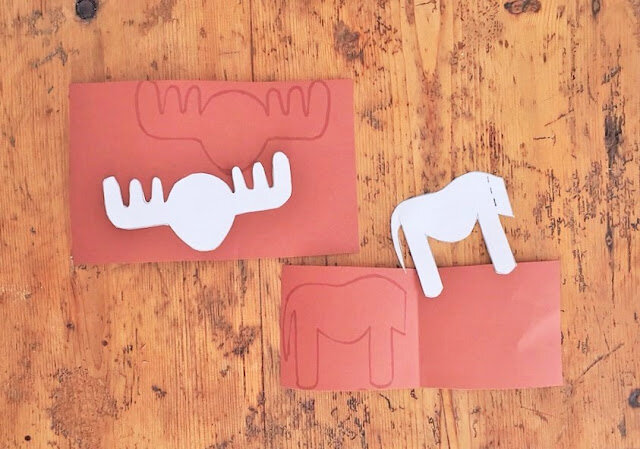
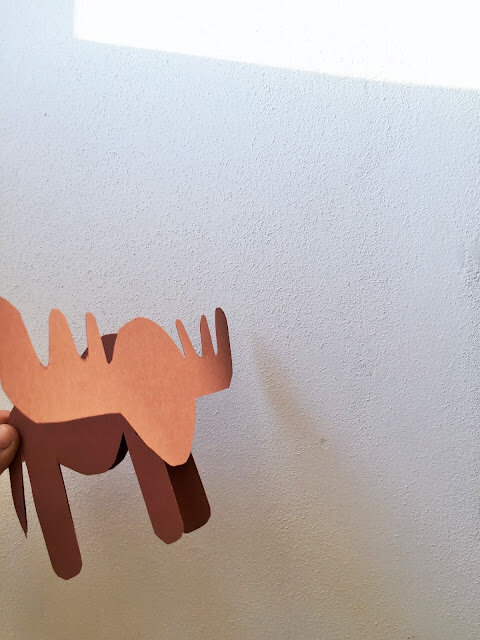
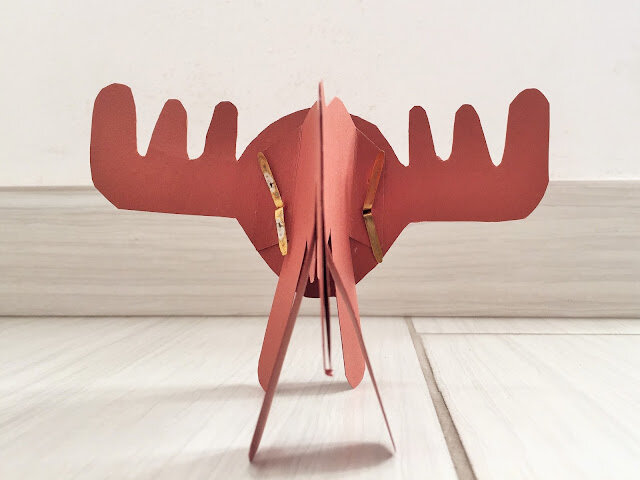
Fase 1: taglia i contorni
Stampa la foto in basso e ritaglia le sagome. Ricalcale sul cartoncino: ti serviranno due sagome del corpo ed una della testa.
Stampa la foto in basso e ritaglia le sagome. Ricalcale sul cartoncino: ti serviranno due sagome del corpo ed una della testa.
Step 1: cut!
Print the pic below and cut the shapes. Retrace them on the craft paper. You'll need two body shapes and one head shape.
Print the pic below and cut the shapes. Retrace them on the craft paper. You'll need two body shapes and one head shape.
Fase 2: assemblare!
Crea una pieghetta verso l'interno in corrispondenza dell'inizio del collo della renna. Incolla le code ed attacca la testa.
Step 2: assemble!
Bend inward the neck of the reindeer in both the shapes. Glue the tails and the head.
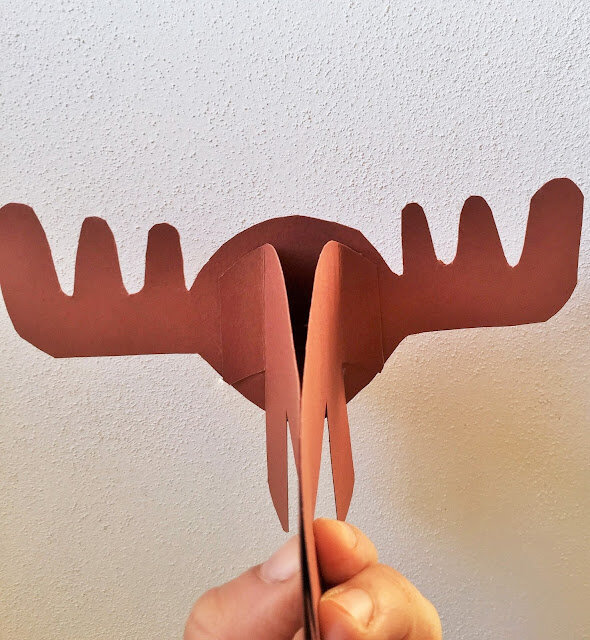
Fase 3: bucare! Bend inward the neck of the reindeer in both the shapes. Glue the tails and the head.
Create un piccolo foro "per ogni collo" della renna, a metà altezza.
Perforate anche ogni metà della testa, nei punti in cui preferite si trovino gli occhi della renna.
Step 3: hole!
Create a small hole for each "neck" of the reindeer, half height.
Pierce even each half of the head, in the points where you want to place the eyes.

Create a small hole for each "neck" of the reindeer, half height.
Pierce even each half of the head, in the points where you want to place the eyes.
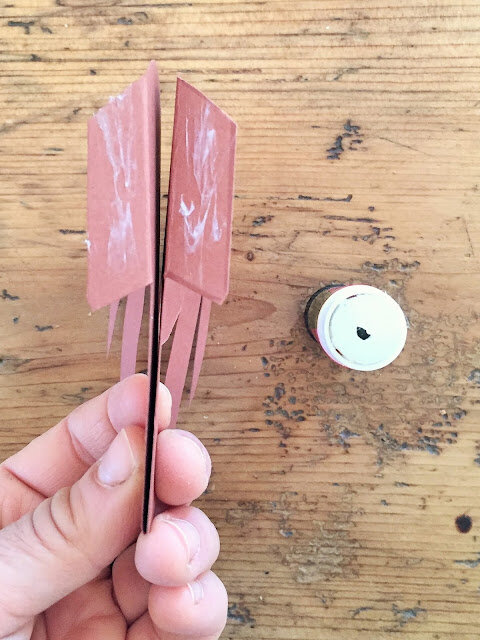
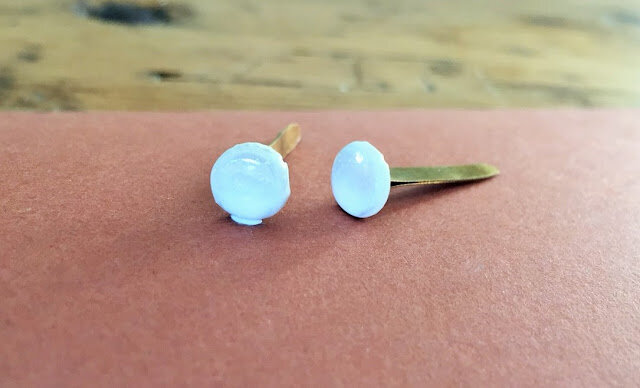
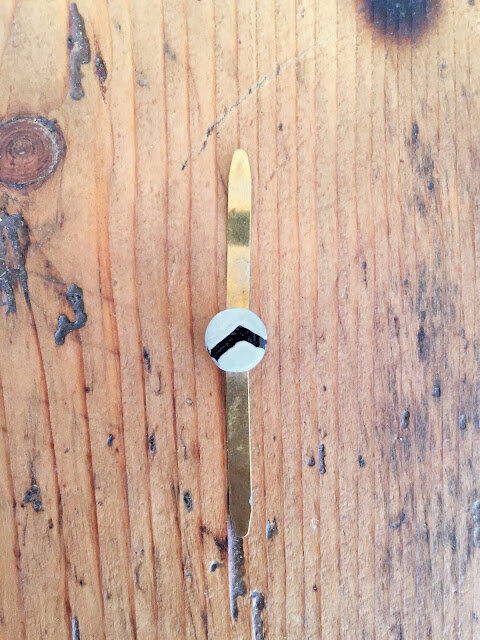
Fase 4: disegna gli occhi.
Apri due fermacampioni e, tenendo le braccia il posizione verticale, disegna gli occhi. Lascia asciugare. Poi Inserisci i fermacampioni nei fori.
Step 5: draw eyes!
Open two split pins and keep the arms vertically. Paint eyes and let them dry. Then, insert split pins in the holes.

Fase 5: inserire il menù.
Apri due fermacampioni e, tenendo le braccia il posizione verticale, disegna gli occhi. Lascia asciugare. Poi Inserisci i fermacampioni nei fori.
Step 5: draw eyes!
Open two split pins and keep the arms vertically. Paint eyes and let them dry. Then, insert split pins in the holes.
Arrotolate il menù e infilatelo tra le sagome del corpo.
Step 4: sketch in the menu.
Roll up the menu and put it between the shapes of the body.
Roll up the menu and put it between the shapes of the body.
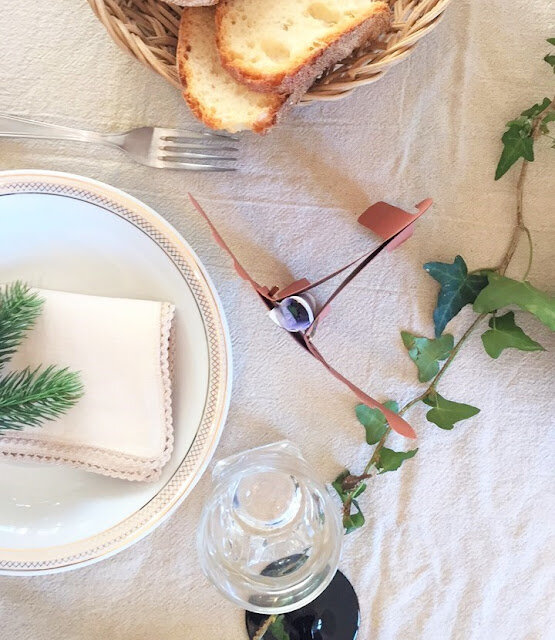
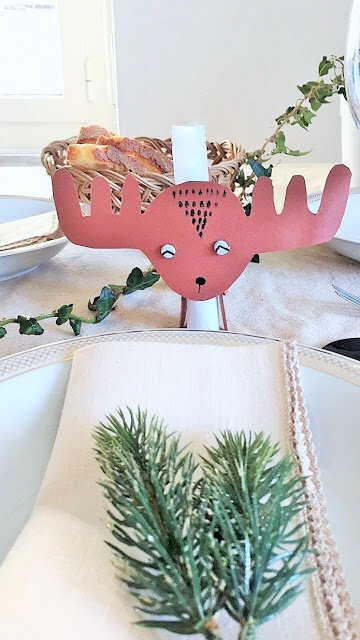
Puoi disegnare i dettagli del viso con il pennarello nero. Il risultato è questo! Una simpatica renna portamenù con gli occhioni!
You can draw facial details with the black felt pen. This is the result! A funny reindeer with big eyes.
Se seguirete il mio tutorial, lasciatemi un commentino qui sotto o postate la foto sui social con il tag #natalechiccacasa!
If you follow my tutorial, please leave me a comment below or post the pics on the socials with the tag #natalechiccacasa!
Styling, project and photos by Federica Del Borrello